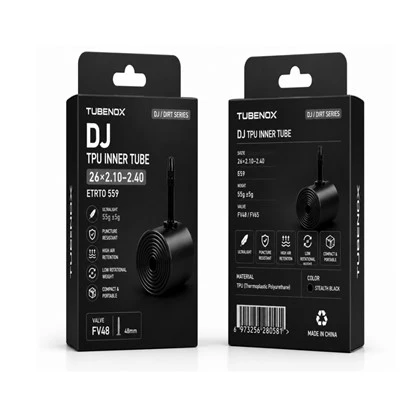
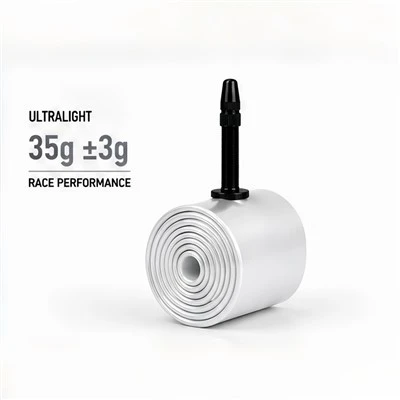
TPU inner tubes are lighter and more compact than traditional butyl tubes, but they require a slightly different installation method. Excessive pre-inflation, sharp tire levers and incorrect valve positioning can damage the thin TPU material before the bicycle is even ridden.
This guide explains how to install a TPU bicycle inner tube correctly and avoid the most common causes of leaks and installation failure.
Why TPU Inner Tubes Need More Care During Installation
Thermoplastic polyurethane allows an inner tube to be manufactured with much thinner walls than a conventional butyl tube. This reduces both weight and folded size, making TPU tubes popular for road racing, gravel riding, mountain biking and compact emergency spares.
The material behaves differently outside the tire. A TPU tube should not be inflated like a normal butyl tube before installation. Without the tire and rim supporting it, excessive inflation can stretch or permanently deform the tube.
Correct installation is therefore important for protecting:
The thin TPU tube body
Welded seams
Valve-to-tube connection
Areas next to the tire bead
The tube's intended shape and dimensions
What You Need Before Installation
Prepare the following items before removing the tire:
A TPU inner tube in the correct wheel diameter
A compatible tire-width range
The correct valve type and length
A bicycle pump with a pressure gauge
Plastic tire levers, if necessary
A clean cloth for checking the rim and tire
Confirm the size printed on the tire sidewall. The tube's wheel diameter must match the tire and rim exactly.
For example, a tube marked 700×18–32C is intended for compatible 700C tires between 18mm and 32mm wide. A 20-inch 406 tube must not be installed on a 451 rim, even though both may be described as 20-inch bicycle wheels.
Step 1: Inspect the Tire and Rim
Remove the old tube and check the entire inside surface of the tire. Small pieces of glass, wire or metal can remain embedded in the casing and immediately puncture the replacement tube.
Run your fingers carefully along the inside of the tire and inspect:
The tread area
Both tire sidewalls
The tire bead
The valve opening
The rim tape
The rim tape should fully cover every spoke hole. Replace it if it is displaced, torn or too narrow for the rim bed.
Also check the rim for sharp edges or burrs around the valve hole. These can damage the valve base during inflation or riding.
Step 2: Confirm the Valve Length
The valve must extend far enough beyond the rim for the pump head to connect securely.
Common TUBENOX Presta valve options include:
FV48: suitable for many standard and shallow rims
FV65: intended for moderately deep rims
FV85: used with deeper aerodynamic rims
Do not select a valve that only reaches the outer edge of the rim. There should be enough exposed length to attach and remove the pump without pulling sideways on the valve.
Step 3: Add Only Enough Air to Give the Tube Shape
Before placing the tube inside the tire, introduce a very small amount of air. The purpose is only to help the tube take shape and reduce folds.
Do not inflate it to normal riding pressure outside the tire.
Different TPU products can have different pre-inflation limits, so always follow the tube manufacturer's instructions. If no specific value is provided, keep the tube soft and only slightly formed.
Excessive inflation outside the tire may cause:
Localised stretching
Permanent deformation
Seam damage
Bulging around the valve
Reduced dimensional stability
Step 4: Insert the Valve Straight into the Rim
Place one side of the tire onto the rim. Insert the valve through the valve hole and make sure it sits straight rather than leaning toward either side.
Avoid pulling forcefully on the valve. The connection between the valve base and TPU tube body should not be used to stretch the tube into position.
If a retaining nut is supplied, fit it loosely at this stage. Tightening it too early can hold the valve in an incorrect position or hide movement as the tire bead is installed.
Step 5: Position the Tube Evenly Inside the Tire
Work around the wheel and place the tube inside the tire cavity. Check that it lies evenly without twisting, overlapping or folding.
The tube should sit completely inside the tire. No section should hang below the tire bead or become trapped between the bead and rim.
Pay particular attention to:
The area immediately beside the valve
The final section of tire bead being installed
Narrow road tires with limited internal space
Wider TPU tubes folded tightly for packaging
A small fold can become a concentrated stress point when the tire reaches full pressure.
Step 6: Install the Second Tire Bead Carefully
Begin opposite the valve and work the second tire bead onto the rim using both hands. Finish near the valve so that the tube has room to settle inside the tire.
Whenever possible, install the bead by hand. If tire levers are required, use smooth plastic levers and make sure the lever does not catch the tube.
Sharp or metal tire levers can cut or pinch TPU material. Even when no visible hole appears, a small surface injury may develop into a leak after inflation.
At the valve, gently push the valve inward before seating the final part of the bead. This helps prevent the reinforced valve area from becoming trapped underneath the tire bead.
Step 7: Check Both Sides Before Full Inflation
Before adding full pressure, inspect the complete circumference of the wheel.
Push the tire sidewall inward slightly and confirm that no part of the tube is visible between the tire bead and rim. Repeat this check on both sides.
Also confirm that:
The valve remains straight
Both beads sit evenly in the rim
The tube is not visible
The tire has no twisted sections
The valve base is not trapped under the bead
This short inspection prevents many installation-related failures.
Step 8: Inflate Gradually
Inflate the tire in stages rather than immediately applying full pressure.
Add a small amount of pressure first and rotate the wheel while checking the bead line. The tire should rise evenly around the entire rim.
If one section appears higher or lower, stop inflating and reseat the tire. Do not continue adding pressure to force the bead into position.
Once the tire is seated correctly, inflate it to a pressure suitable for:
The tire manufacturer's stated range
The rim specification
Rider and bicycle weight
Tire width
Road or trail conditions
Do not automatically use the maximum pressure printed on the tire.
Common TPU Inner Tube Installation Mistakes
1. Inflating the Tube Too Much Before Installation
This is one of the most common mistakes. A TPU tube is designed to reach its working shape while supported by the tire and rim.
2. Using the Wrong Wheel Diameter
A 406 and a 451 BMX tube cannot be substituted for one another. The same caution applies when comparing 650B, 700C, 26-inch, 27.5-inch and 29-inch sizes.
3. Trapping the Tube Under the Tire Bead
A trapped section may rupture during inflation or fail shortly after riding begins.
4. Pulling or Twisting the Valve
Sideways force can place unnecessary stress on the valve connection. The valve should pass straight through the rim hole.
5. Using Sharp Tire Levers
Metal tools or damaged plastic levers can cut thin TPU material more easily than expected.
6. Ignoring the Rim Tape
A new tube will not solve repeated punctures caused by exposed spoke holes or damaged rim tape.
After Installation
Check the tire pressure again before the first ride. A small pressure adjustment after installation does not necessarily indicate a defective tube because the tire, valve and pump connection may settle during the initial inflation cycle.
If the pressure continues to drop noticeably, inspect:
Valve closure
Valve-core tightness, where applicable
Tire bead seating
Possible installation damage
Embedded objects inside the tire
Rim tape condition
Use a repair method specifically designed for TPU material if a puncture occurs. Standard butyl patches and vulcanising cement may not bond correctly to TPU.
TPU Inner Tube Installation FAQ
1. Can I inflate a TPU tube before putting it inside the tire?
Only add enough air to give it a basic shape. Do not inflate it to riding pressure outside the tire, and follow the manufacturer's stated pre-inflation limit.
2. Can I use normal tire levers?
Smooth plastic tire levers may be used carefully. Avoid metal levers or tools with sharp and damaged edges.
3. Does a TPU inner tube need talcum powder?
Normally, it is not required. Follow the installation instructions supplied with the specific tube rather than applying powders or lubricants automatically.
4. Can a TPU tube be installed more than once?
Some TPU tubes can be reinstalled if they remain undamaged and are returned to a compatible tire size. Inspect the tube, seam and valve area carefully before reuse.
5. Can I fit the same TPU tube into a wider tire?
Only if the new tire falls within the tube's stated width range. Stretching a tube beyond its intended range can affect wall thickness and reliability.
6. How do I know which Presta valve length to choose?
Measure the rim depth and select a valve that leaves sufficient exposed length for the pump head. FV48 works with many shallow rims, while FV65 and FV85 are intended for deeper profiles.
7. Can I repair a punctured TPU inner tube?
Many TPU tubes can be repaired using TPU-compatible patches or repair kits. Conventional butyl repair materials may not provide a reliable bond.
8. Why did my new TPU tube leak immediately after installation?
Common causes include a trapped tube, excessive pre-inflation, an embedded object, damaged rim tape, an incorrect tube size or injury from a tire lever. Inspect the entire wheel before assuming the tube had a manufacturing defect.
Source TPU Inner Tubes for Your Product Range
TUBENOX supplies lightweight TPU inner tubes for road, gravel, MTB and BMX applications, with multiple tire-size and Presta valve options available. Tube weight, thickness, colour, valve length, retail packaging and private-label branding can be developed around your target market.
Contact TUBENOX to request specifications, samples or an OEM quotation for your next bicycle inner tube project.